I have always said that you can not defeat Mother Nature however, we can mitigate the damage from excessive heat buildup in the attic during the summer months and the damaging affects caused by moisture and heat loss in our attics that creates and helps feed the ice buildup at our roof”s eave edges during prolonged below freezing temperatures in the winter.
Proper Intake and Exhaust Venting is Required to Validate your new Shingles Warranty
All roofing manufacturers require proper ventilation in order to validate their new shingle warranties however, most roofers not only do not understand how to measure for proper ventilation but fail to install it leaving the homeowner who has paid for a warranty, without one.
In our original blog (Ice Dams: How the are Formed and What Causes Them) we discussed what causes ice dams and more specifically how they are formed:
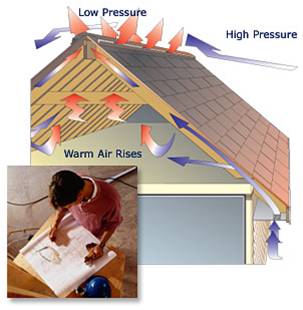
“During the winter homeowners heat the interior of their home. That heat rises up through the ceiling into and through the attic’s insufficient insulation warming the air space above the insulation and below the roof’s decking. Poor ventilation prohibits this warm air from escaping. This heat transfers its warmth through the roof’s decking and warms the shingles on your roof.”
Another problem most homeowners give no thought to is the three to five gallons of moisture that is created from normal everyday
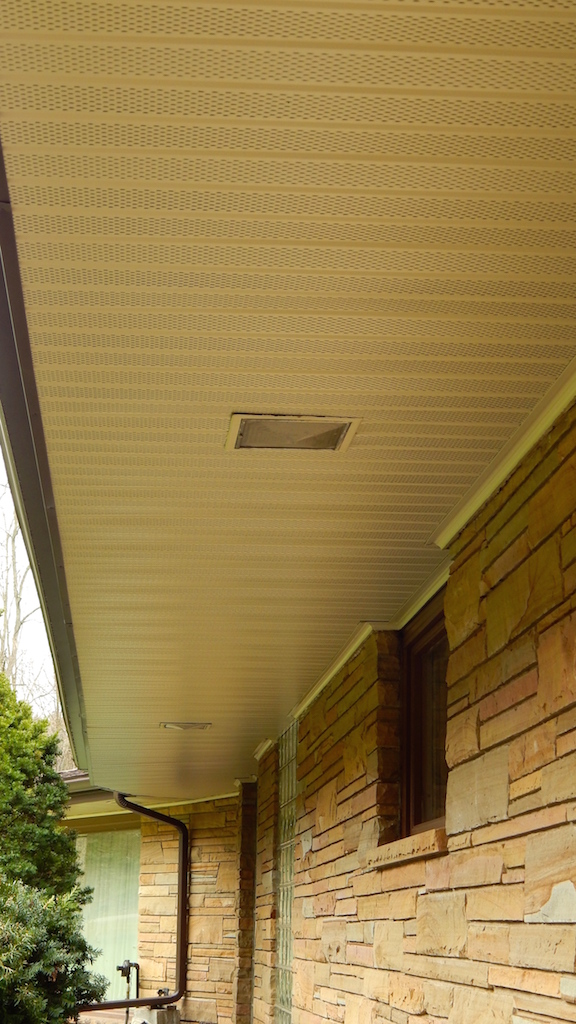
Ventilated Aluminum Soffit Panels to Maximize Proper Intake Venting
human activity inside the home when we take baths, showers, wash dishes can including updated furnaces that have humidifiers built into them that releases additional moist air into the interior of the home. This moisture makes its way up through your ceiling and insulation and into to the open air portion of your attic where it comes in contact with the colder roof deck. This moisture then condenses into tiny water droplets not only warping the roof deck but also falls onto the insulation below wetting the insulation which causes the insulation to be compacted and over-time reducing your insulations effectiveness/R-value and keeping that heat inside the living areas of your home.
The goal is to remove or exhaust the warm moist air out of the attic and try and keep the air in the attic as cool and dry as the air on the outside.
So what do we do with the heated moist air moving through the insulation and warming the roof’s decking and the moisture wetting and reducing your
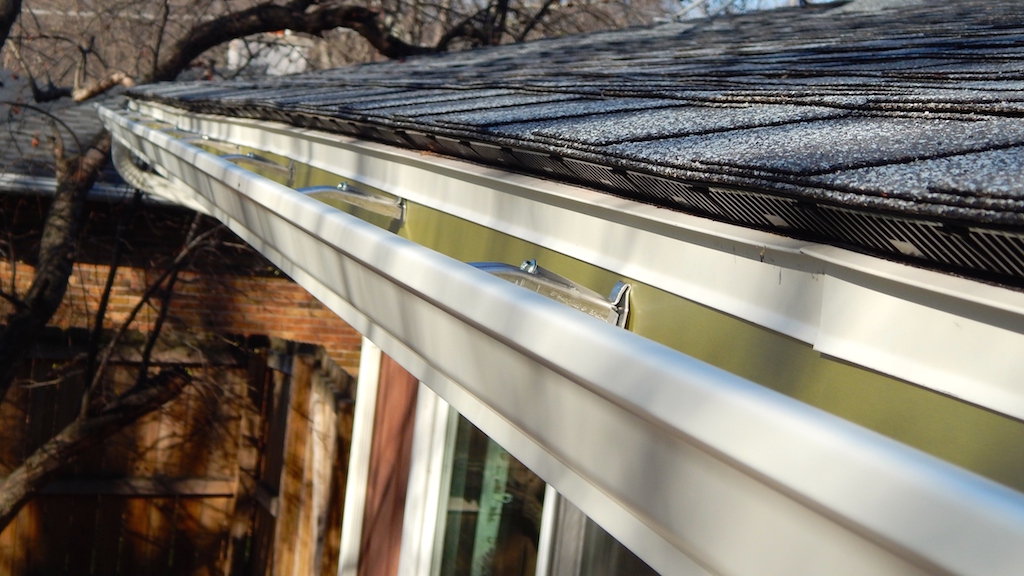
The Edge intake Vent.
insulations effectiveness? Proper attic ventilation requires the process of air-intake vents typically located under the eave edge or overhang of your roof to allow cool dry air to enter the attic and push the warm moist air out through the exhaust vents located on exterior of roof at its highest point or at its peak. Most homes do not even come close to having enough intake and exhaust vents and unfortunately almost all roofers do not understand the process themselves and fail to install proper ventilation during the roofing process. Subsequently the homeowner finds out when ice dams form each winter or the roof’s shingles become very brittle over a short period of time from heat buildup in the summer. Most attics in the summer can reach temperatures of up to 150 degrees or more.
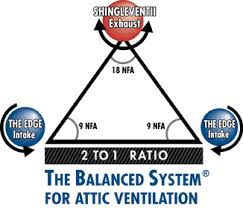
In order to determine just how much ventilation your attic needs in order to optimize it’s ventilation and validate your new shingle’s warranty you will need to have both intake and exhaust vents. If we think of the total ventilation needed in percentage numbers we will need to have 50% at the roof’s peak and the other 50% located at the eave edge which can also be split 25% by 25% at the front eave edge and back eave edge of the roof.
The following has been re-printed from AirVent.com Principles of Attic Ventilation
http://www.airvent.com/pdf/literature/PAVbooklet.pdf
Note: The following process is used to calculate requirements for non-powered ventilation systems. If you plan to install a power fan, see calculation instructions on page 14.
- Determine the square footage of attic area to be ventilated.
To do that, just multiply the length of the attic (in feet) by its width.
Example: For this and the following calculations, we’ll assume the home has a 40′ by 25′ attic area.
Calculation:
40′ x 25′ = 1,000 square feet of attic area
- Determine the total net free area required.
Once attic square footage is known, divide by 150
(for the 1/150 ratio). That determines the total amount of net free area needed to properly ventilate the attic.
Calculation:
1,000 sq. ft. ÷ 150 = 6.6 square feet of total net free area
- Determine the amount of intake and exhaust (low and high) net free area required.
For optimum performance, the attic ventilation system must be balanced with intake and exhaust vents.
This is a simple calculation: just divide the answer from Step 2 by 2.
Calculation:
6.6 ÷ 2 = 3.3 sq. ft. of intake net free area and 3.3 sq. ft. of exhaust net free area
- Convert to square inches.
The net free area specifications for attic ventilation products are listed in square inches. Therefore, let’s convert our calculation in Step 3 from square feet to square inches. To do this simply multiply by 144.
Calculation:
3.3 sq. ft. x 144 = 475 sq. in. of intake net free area and 475 sq. in. of exhaust net free area.
In our next blog we will cover proper insulation.