Flashing: Walls, Chimneys & Roof Edges
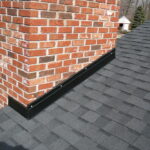
The first step in installing the Dennison Exterior Solutions Leakproof Roofing system after ensuring proper airflow will not be obstructed by the insulation inside the attic and that the roof deck is in prime condition to support an updated roofing system that will last for 50 plus years is to install proper aluminum wall, chimney, and roof edge flashings.
ROOF FLASHING WORKS LIKE SHINGLES: it overlaps and sheds water. Flashing is always constructed in a system to work with the effect of gravity. When correctly designed and installed, flashing can only be defeated by water running uphill. This can happen in the presence of snow, ice or wind-driven rain. The best backup security for flashing systems currently is the presence of water flowing up the pitch of the roof is waterproofing shingle underlayment beneath it which will be discussed in my next Blog Shingle Underlayment’s.
DRIP EDGE
Drip edge is the simplest flashing. It is used at the rakes and eaves. On rakes, drip edge is installed on top of the underlayment to prevent wind-driven rain from getting beneath it. On eaves, it is installed beneath the underlayment to allow water to shed smoothly off the roof if it gets under the shingles.
Dennison Exterior Solutions also wraps the waterproof underlayment over on to the fascia at the eave edges by about ½” to prevent ice back up under the drip edge from reaching the underside of the roof deck and preventing leakage into the soffit area.
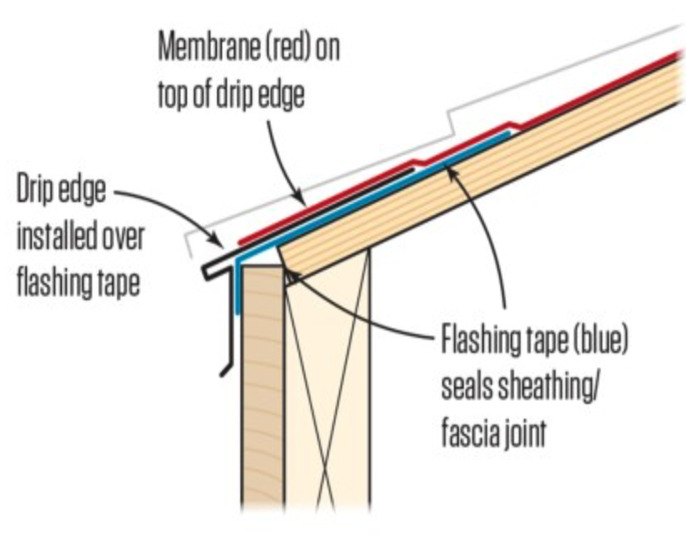
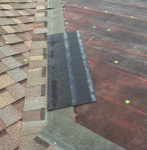
The Blue Line Represents the WinterGuard Ice & Water Shield Waterproof Underlayment
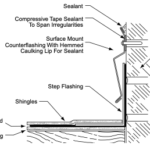
Flashing Against a Side Wall
- The width of the step flashing on the deck must be at least 3″ wide.
- The height of the step flashing installed against the vertical surface must be at least 2″ high. Generally, higher step flashings provides better protection from water infiltration.
- For a step flashing application, the pieces of flashing must overlap each other by at least 2″.
- The length of the step flashing pieces depends on the type of shingles being applied. Refer to the installation instructions included with the shingles.
Wall Flashing Installation – 720WebShareName
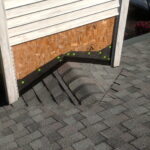
Flashing Against Vertical Front Walls
To apply base flashing against a vertical front wall:
- Apply the shingles up the roof until a course must be trimmed to fit at the base of the vertical wall. By planning ahead you can adjust the exposure slightly (and evenly) in the previous courses, so that the last shingle is at least 8″ (vertically) wide. This allows a minimum 5″ exposure of the top course and a 3″ headlap.
- The metal flashing strip should be bent, using a metal brake, to extend at least 2″ up the vertical wall and at least 3″ onto the last shingle course; that is, to the top of the cutout.
- Apply the metal flashing, which can be 8′ to 10′ in length, over the last course of shingles. Embed the metal flashing in asphalt roofing cement, or another appropriate adhesive, and nail it
to the roof every 12″. Do not nail the strip to the wall. - If side laps are necessary, overlap the pieces at least 6″. Do not fasten in this joint area.
- If desired, apply an additional row of shingles over the metal flashing strip, trimmed to match the vertical width of the metal flashing strip on the shingle surface. Fasten shingles with face nails sealed over with a small dab of roofing cement, and sprinkle shingle granules on to the cement.
- Next, if there is siding, bring it down over the vertical part of the step flashing to serve as cap flashing. Do not nail the siding into the vertical flashing.
- If the vertical front wall meets a sidewall, as in dormer construction, cut the front flashing so that it extends at least 7″ around the corner. Then continue up the sidewall with step flashing as described earlier. A good quality caulk, or asphalt roofing cement, may be useful to fully seal behind corner joints.
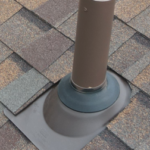
Soil Vent Pipes
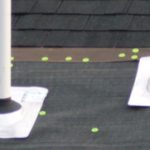
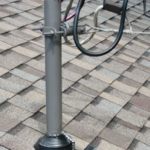
Practically all homes have circular vent pipes projecting through the roof that vent the plumbing inside the home. Before installing the soil pipe flashing boot, apply waterproof WinterGuard® around the penetration as follows: Cut a square piece of WinterGuard. Center the piece over the pipe’s top and cut an X into the WinterGuard slightly smaller than the inside diameter of the pipe’s opening. Remove the release film, then lower the WinterGuard around the pipe and seal it to the deck and underlayment. After that, install the shingles up to the vent pipe. Then cut a hole in the shingle that will go over the pipe and install the shingle setting it in asphalt plastic cement. This method diverts any water away from the roof penetration and out over the shingle. Next, place a preformed flashing flange, sized to fit snugly over the pipe, over the s vent pipe and set it in asphalt roofing cement. Be sure the flange is seated squarely on the roof.
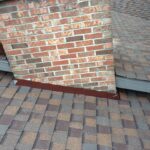
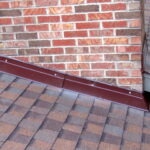
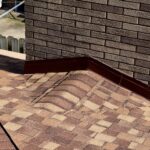
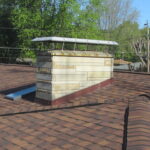
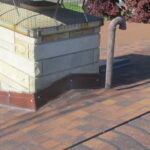
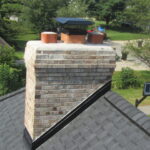
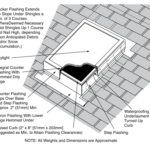
Flashing Around Chimneys
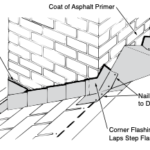
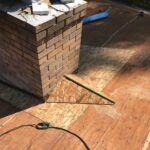
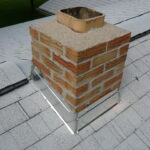
The 7 steps ensure a water-tight non-leaking chimney where the walls of the chimney meet the roof deck.
- We install a cricket or saddle behind the chimney in order to properly drain water around the chimney and to prohibit water from ponding behind it.
- We then install waterproof underlayment ice and water shield and it is adhered to the decking around the chimney and the wall of the chimney.
- High-Grade roofing cement was then applied on top of the waterproof underlayment including up on the wall of the chimney.
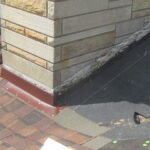
- Metal Step Flashing is then installed on top of the High-Grade roofing cement and the waterproof underlayment.
- 50 Year Warranty Shingles are then installed with the Metal Step Flashing which is on top of the High-Grade roofing cement and waterproof underlayment.
- Metal Counter-Flashing is then installed to cover all of the areas where the 50 Year Warranty Shingles, the Metal Step Flashing, the High-Grade roofing cement and the waterproof underlayment was installed.
- High-Grade Clear Geocell Sealant was then applied to all exposed joints of the Metal Counter-Flashing
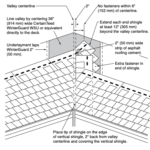
Valley Installation – Our No cut Valley Installation
Prior to shingle application, we have already installed the waterproof underlayment on the entire roof deck.
Begin the valley application using shingles in the following manner:
- Lay the first shingle course along the eaves of the first roof plane
and across the valley, onto the adjoining roof plane, at least 12″. Press the shingles well into the valley prior to fastening.
NOTE: Always start applying the shingles on the deck with the least area of watershed.
- Follow standard fastening instructions, with the exception that fasteners may not be installed within 6″ of the valley’s centerline.
- Follow the same procedure for succeeding courses, going up the valley on the first side.
- On the adjoining roof plane, snap a chalkline 2″ back from the valley centerline. Apply shingles “vertically” facing the valley and 2″ back from the valley centerline (use chalkline as a guide.)
- Apply the shingles on the adjoining roof plane by positioning the lower left corner of the shingle of each row 2″ back from the centerline (flush with the edge of the vertical shingle.) and over the top of the “vertical shingle.”
Skylights
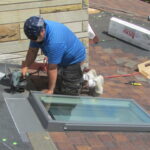
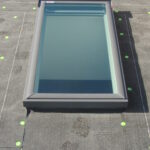
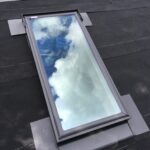
Most skylight manufacturer’s provide their own instructions for flashing their skylights. The sides of the skylight is flashed much like a chimney. We install waterproofing underlayment around the entire deck and bring the underlayment up onto the side walls of the skylight. Step flashing is installed on the sides; base flashing is installed upslope, holding one course of shingles away from the curb to encourage rain to wash away dirt and debris. The skylight itself provides the counter flashing or cap. Most new skylight have their own flashing kits. Dennison Exterior Solutions skylight installation methods provides 3 layers of flashing protection which includes waterproof underlayment.
The video below is why Dennison Exterior Solutions recommends new skylights be installed when a new 50 Year Warranty roof is being installed as it is almost impossible to remove the previous roof company’s negligence by them using roofing cement around the perimeter of the skylight instead of waterproof underlayment as we do as shown in the photos.


